![Optii Logo 3x (2)-3.png]](https://help.optiisolutions.com/hs-fs/hubfs/Optii%20Logo%203x%20(2)-3.png?height=40&name=Optii%20Logo%203x%20(2)-3.png)
Creating service jobs in Optii is now simpler and faster than ever. The updated Add Job experience introduces streamlined menus, searchable location lists, automated departmental routing, and smart quick-select history to help you manage guest and internal requests with minimal effort.
🎬 VIDEO TUTORIAL (0:40)
Watch the Quick Walkthrough:
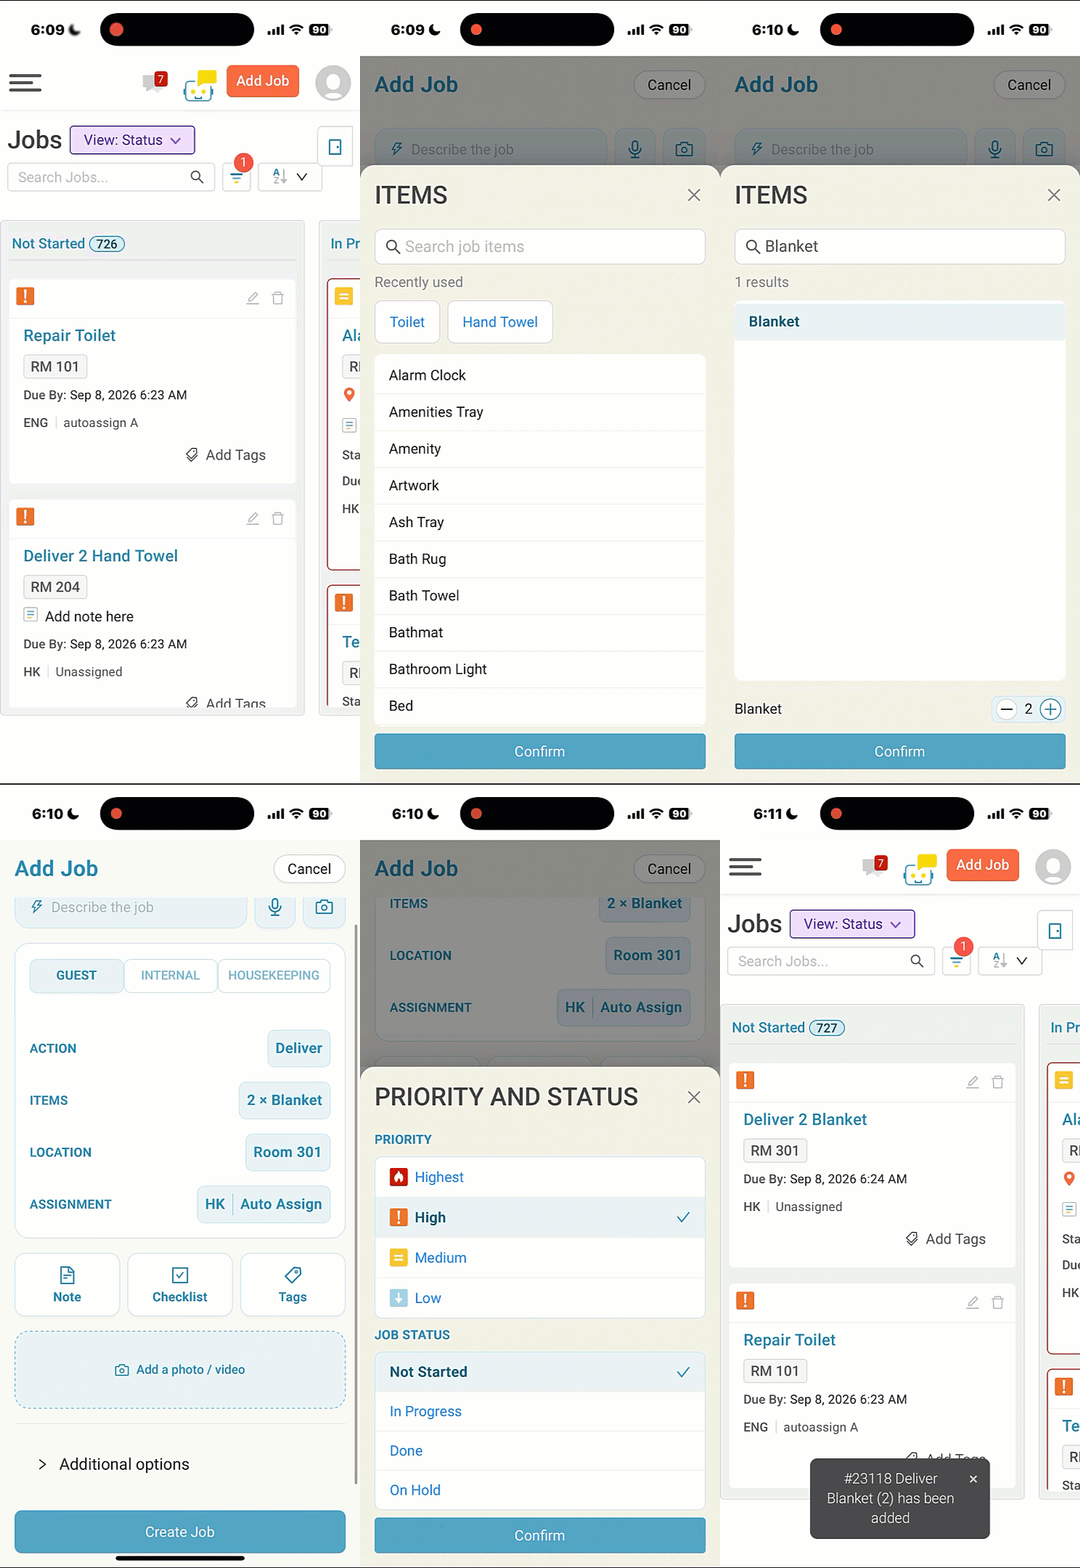
Prefer watching over reading? Check out this short video demonstrating the complete step-by-step process flow below.
Step-by-Step Job Creation Workflow
Step 1: Choose Request Type & Action
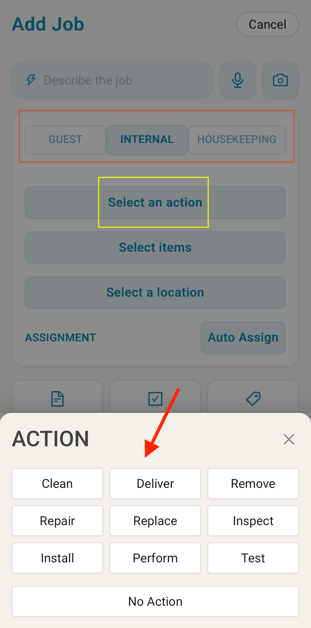
- Select Request Type: Begin by choosing whether you are creating a Guest Request or an Internal Request.
- Select an Action: Tap "Select an Action." A pop-up drawer will appear at the bottom of the screen. Pick the action that best matches your job. Once selected, you will automatically return to the main Add Job screen.
Step 2: Select Items & Quantities
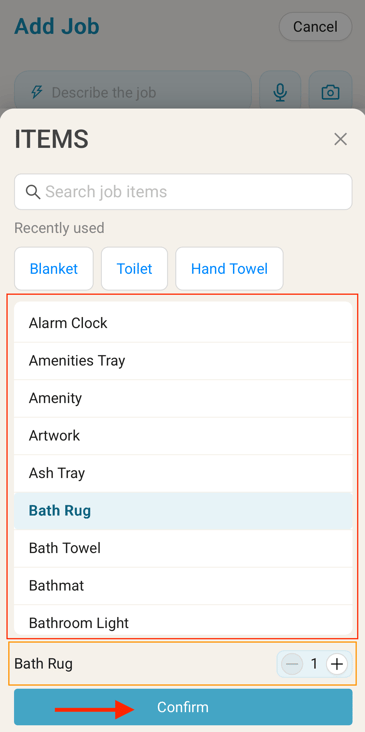
- Tap "Select Items" to open the Items view.
- Use the search bar at the top of the screen to quickly locate required job items.
- Once an item is selected, an inventory bar will appear at the bottom of the screen to adjust quantities as needed.
- Select Confirm at the bottom of the screen to save your items.
🌟 NEW FEATURE — 10 Most Recent Jobs Quick-Select
Optii now automatically remembers up to your 10 most recently created jobs and displays them as quick-select boxes directly above the item list.
- Why it helps: If you create the same types of jobs throughout the day, you no longer need to search for the same items repeatedly—just tap your recent job box to create requests instantly!
Step 3: Select Location
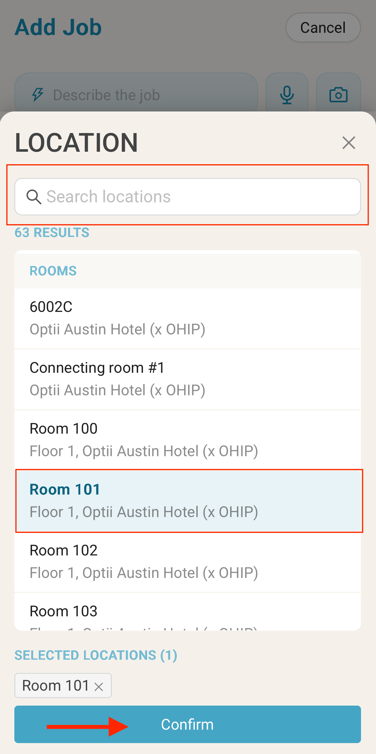
- Tap "Select a Location" to open the Location screen.
- Search through the new searchable list (replacing the previous drop-down menu).
- Search for and select one or more locations, then tap Confirm at the bottom of the screen.
Step 4: Automated Assignments & Additional Details
- Auto-Assignment: Once you select an Action and Item, Optii automatically uses pre-configured system rules to assign the correct Department and Role.
- Manual Adjustment: If you need to override the assignment, tap the Department box to update the department, role, or specific assignee.
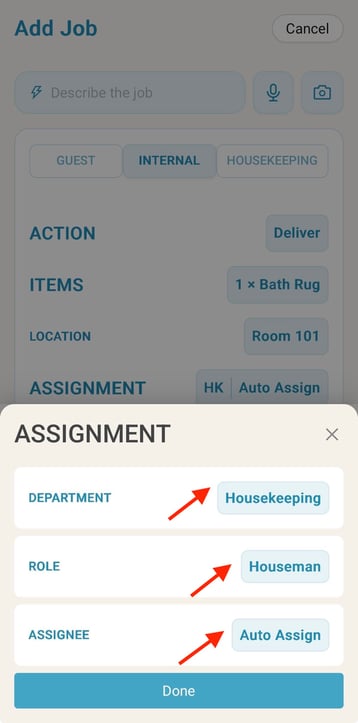
- Notes, Checklists, Tags & Photos: Functions as standard.
- 💡 Note Reminder: When you finish typing a Note, tap the "X" in the top-right corner of the pop-up drawer to save your note to the job.
Step 5: Additional Options & Custom Job Status
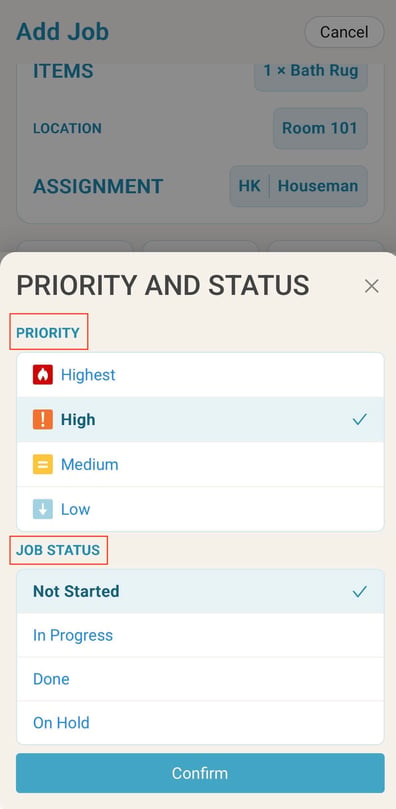
Expand the Additional Options toggle at the bottom of the Add Job screen to access Priority, Status, and Scheduling settings:
- Priority: Sets priority levels automatically (Guest Requests = High, Internal Requests = Low). Priority can be adjusted manually whenever needed.
- Job Status: New jobs start as "Not Started" by default. However, you can choose to launch a job in a different status, such as In Progress or Completed.
💡 Practical Scenario — Instant Completion
Example: An engineer is called to a guestroom to fix a curtain rod. While there, they notice a desk lamp bulb is burnt out and replace it on the spot.
Instead of creating a job and searching for it later to mark it finished, the engineer can create the lamp request and set its initial status directly to "Completed." This keeps Optii up to date instantly with zero extra steps.
Step 6: Date & Time Scheduling
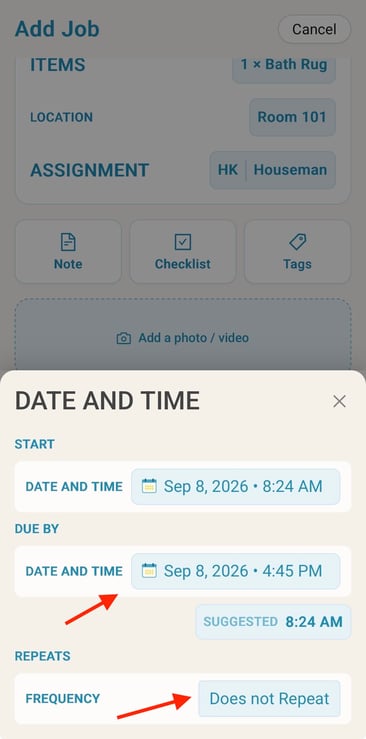
At the bottom of the screen under Date & Time, you can:
- Schedule a job for a future date or time.
- Configure the task as a recurring/repeating job.
Quick Reference Summary Table
| Stage | Action in Optii | Key Tip / New Feature |
| 1. Request Type & Action | Select Guest or Internal > Tap Select an Action | Uses new bottom pop-up menu drawer. |
| 2. Items | Search & select items > Adjust quantity | Features Top 10 Recent Jobs quick-select buttons. |
| 3. Location | Tap Select a Location > Choose locations | Replaces old drop-down with a full searchable list. |
| 4. Assignment | Auto-populated by Optii | Department/Role auto-fill; tap X on note drawer to save. |
| 5. Priority & Status | Expand Additional Options | Set custom initial status (Not Started, In Progress, or Completed). |
| 6. Scheduling | Set Date & Time | Create future-dated or recurring scheduled jobs. |
💡Tip: Feel free to share this valuable resource with your colleagues to explore Optii.
Would you like to learn more?
If you would like to learn more about Optii, please check out our Optii learning centre today at help.optiisolutions.com
Have questions or need help?
Do you have any questions about Optii? Please contact your success manager today at help@optiisolutions.com