This guide will walk you through the simple steps to schedule jobs within the Optii platform with a future start date and time. This is particularly useful for planning jobs in advance and ensuring efficient workflow.
Step 1: Accessing Job Details
- Begin by clicking on 'Add Job' that you wish to schedule. This will open the job details view.

Step 2: Navigating to Job Scheduling Options
- Confirm the selection: 'Guest Request' or if an internal job select 'Internal' or for housekeeping jobs select 'Housekeeping'
- Within the job details, locate and select the relevant action 'Clean, Deliver, Remove...etc.
- Next, select the specific item associated with the job and the relevant location where the job needs to be performed.

Step 3: Locating the Start Date and Time Settings
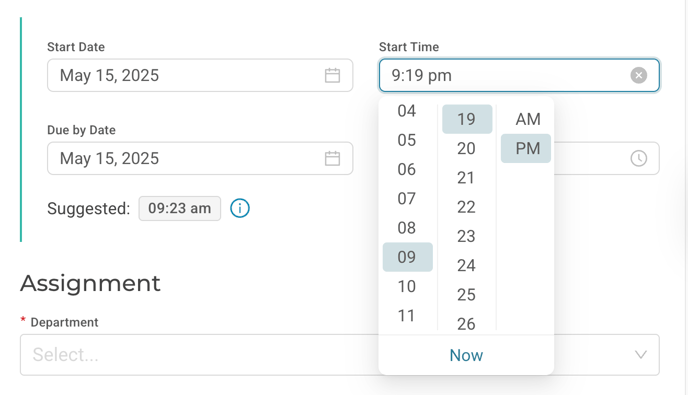
- Scroll down within the job details view until you reach the section that displays the "Start Date" and "Start Time." You'll typically find this information around the middle of the page.

By default, the platform pre-populate the "Start Date" and "Start Time" based on your response times for guest requests or internal tasks.
Step 4: Modifying the Start Date (Scheduling for a Future Date)
- To schedule the job for a future date, click on the 'Start Date Field'.
- A calendar interface will appear. Select the specific date you wish the job to be scheduled for by clicking on it. The selected date will then populate the "Start Date" field.

- If you want the job to be scheduled for the future date with a different start time, click on the "Start Time" field.
- A time selection interface will appear (this might be a dropdown menu, scrollable list, or a clock-like interface). Select the desired start time for the job. The selected time will then populate the "Start Time" field.
Step 5: Modifying the Start Time (Scheduling for a Later Time Today)
- If you want the job to be scheduled for the current date but with a later start time, click on the "Start Time" field.
- A time selection interface will appear (this might be a dropdown menu, scrollable list, or a clock-like interface). Select the desired start time for the job. The selected time will then populate the "Start Time" field.
Step 6: Saving Your Scheduling Job Preferences
- Once you have set the desired future start date and/or time, be sure to click on the "Save," button to confirm your changes.

Bonus Tip: Viewing Future Scheduled Jobs
- To easily see all jobs that are scheduled for a future date or with a future start time, navigate to the "Job Status" view within the platform.
- Look for a toggle or filter option, often labeled "Only Show Future Jobs." Activating this toggle will display only those jobs that have a start date or time set in the future, allowing for proactive planning and management.

Would you like to learn more?
If you would like to learn more about Optii, please check out our Optii learning centre today at help.optiisolutions.com
Have questions or need help?
Do you have any questions about Optii? Please contact your success manager today at help@optiisolutions.com